Hello! This is Ashley from Aqua Blossom :) I am so excited to be writing this guest blog for Craft Cafe! I make handmade, natural bath and body products, and while it is a super fun and interesting job, I am usually pretty exhausted by the end of the day.
My favorite way to relax and unwind - especially during cooler weather - is with a nice, hot bath. I know, it sounds amazing right now! But what if I told you there was a way to make that bath even more relaxing? Oh, trust me, there is. Bath melts can turn your relaxing bath into a luxurious spa experience, and the best part is that you can make bath melts at home using just a few ingredients, and some kitchen tools that you probably already have.
First, get you'll need to gather the ingredients. I realize not everyone has a slab of cocoa butter just laying around, so I'm including links to Craft Cafe supply shops where you can buy these items.
Here's what you'll need:
- 2 oz, or approximately 1/2 cup cocoa butter
(can be found at Blue Ridge Body Supplies) - 1/4 cup sweet almond oil
(also at Blue Ridge Body Supplies) - fragrance or essential oil
(CandleLynn Supplies has a huge variety of fragrance oils to choose from - just make sure you buy one that is safe for bath and body use)
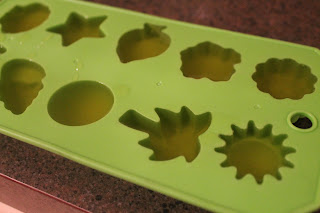
Next, you'll need a few things from your kitchen: a glass measuring cup, metal pot or saucepan, spoon or bamboo skewer to stir, plastic dropper, ice cube tray or mini muffin cups to pour the melts into.
To get started, measure out your cocoa butter and sweet almond oil in the glass measuring cup. Next, you'll need to fill the pan with water and make a double boiler by setting the measuring cup in the water (but do not let any water get into the cup). TIP: if you're using a measuring cup with a handle, you can hang the cup from the side of the pan so it is suspended in the water. Allow the butter and oil to melt slowly, on medium-low heat, stirring occasionally. I like to use bamboo skewers to stir, but a spoon will work just fine.
Once it has melted completely, carefully remove from heat. Now you can add a fragrance oil or essential oil. With an essential oil, you'll only need about 6-8 drops. With a fragrance oil you can use slightly more. If you are using natural cocoa butter, it is going to have a chocolatey smell that can be difficult to mask with floral scents, for example. My advice? Just go with it! Use a sweet smelling fragrance that complements the cocoa. I decided to use Hot Cocoa fragrance :) If you really dislike the natural cocoa smell, you can always use a deodorized cocoa butter.
Finally, it is time to pour into molds. You can use an ice cube tray, small soap or candy molds, or even mini muffin cups. Allow the bath melts to cool - you can pop them in the fridge to speed up the process. The first time I made bath melts, the cocoa butter took HOURS to solidify and I was left wondering what I did wrong. That is totally normal - cocoa butter can take a long time to solidify at room temperature.
Once they have cooled for a while, pop them out of the molds and store them in a container or zip bag. They should last about 6 months, but I'm sure you'll go through them much faster once you give them a try :) Just add one or two (depending on size) to a hot bath and enjoy! PLEASE be careful standing up and getting out of the bath, as they can make the tub slippery.
This is a very simple bath melt recipe - you can get creative and make it your own by experimenting with different butters like shea, mango, and kokum; different oils; and even embellishments like dried lavender buds, rose petals, or sea salt.
I've had so much fun making these and sharing my recipe with you! I hope you have fun as well, and most importantly - have a relaxing day :)


I love this! I was wondering how to make these :)
ReplyDeleteAWESOME tutorial! Thanks!!!