Showing posts with label shipping. Show all posts

1.27.2013

USPS Shipping Rate Increase 1/27/13


USPS RATE ARE INCREASING AS OF 1/27/13

As you may already be aware, the US Postal Service shipping rates are increasing effective January 27, 2013. 
All shipping areas are effected but international shipping has seen the largest increase.

So here at Craft Cafe, we would like to help in updating your shipping costs.

If you are currently using "item priced" shipping, you will need to manually adjust the shipping costs on each listing as you see needed.
**Please note: we are working on a bulk edit system that will make this easier for you to adjust in the future.

If you are currently using "zone shipping" then you will need to clear your current rate table on your shipping page and click the button to add the new rates.  

First, you will want take note of any adjustments you made and may want to keep. 
Second, "Clear All Shipping Values" then right away click "Add Priority USPS Values".
This will update your rate tables for current USPS pricing. 

Remember, this also effects your international shipping, so if you ship internationally using the "zone shipping" be sure to also clear those rates and click "Apply USPS Zone 1 to 8 Rates".

This only effects sellers in the USA.

If you have any questions, please contact us at service@craftcafe.co
You can also find additional information about the shipping rate increase at the USPS website ..
https://www.usps.com/new-prices.htm

See you in the Cafe!

6.22.2012

Tutorial: FLAT RATE shipping by zone/weight

Many of you have asked for it here it is.
Zone shipping - flat rate priority  mail for US AND International.

*NOTES**- USPS 1st class mail to all 50 states & territories is the same cost up to 13oz no matter where you ship from. (zone 1 US)
USPS First class mail international parcel is the same price for Canada/Mexico up to 13 oz. (zone 1 international)

USPS First Class Mail parcel is the same for all remaining countries up to 44 oz (zone 2 international)
USPS Priority Mail flat rate in each size box is the same to all 50 states & us territories - some weight restrictions (zone 1 US)

USPS Priority Mail flat rate in each size box is the same to Canada/Mexico - some weight restrictions (Zone 1 international)

USPS Priority Mail Flat rate in each size box is the same to all other countries (zone2 international)
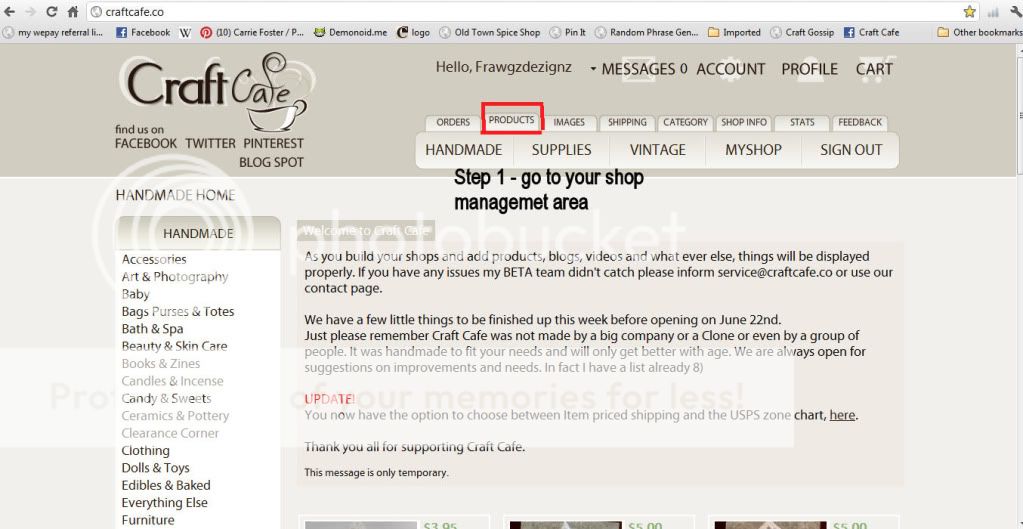
---------------------------------------------------------------------------------------------------------

Now the tutorial:


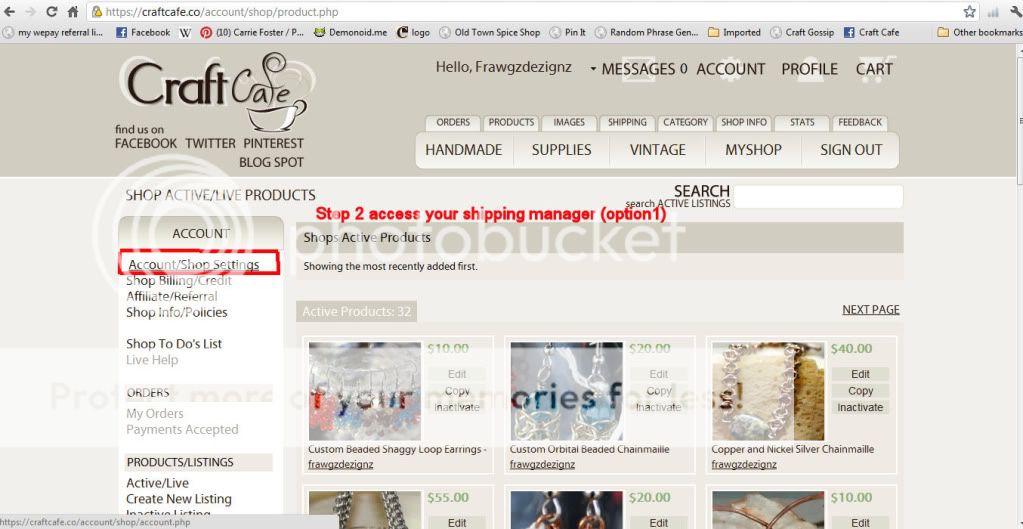
Step 1 go to to the shipping tab at the top of the page - you'll bring up this screen - choose USPS Zone shipping - if you want to make sure  its set reload the page - and it'll say 'Current: USPS Zone Shipping'.


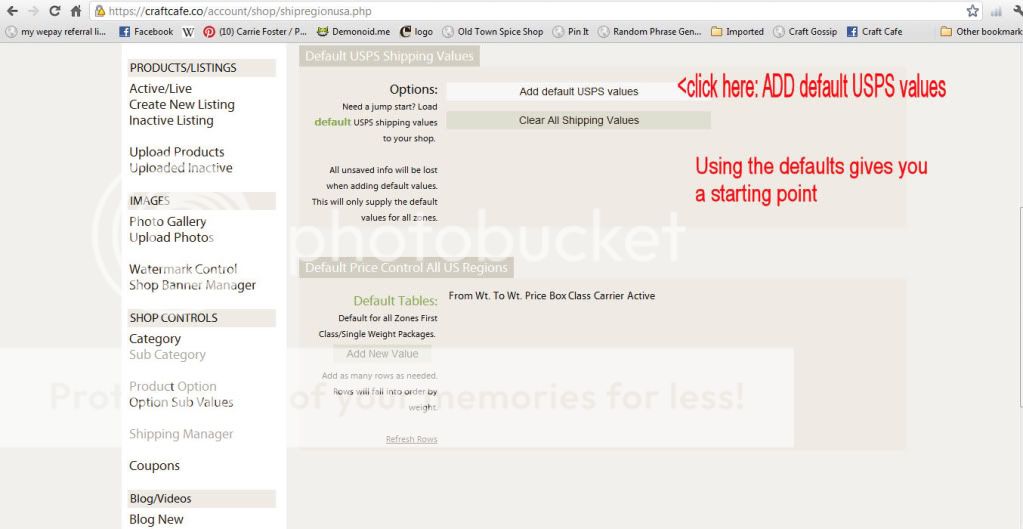
Scroll down the page a bit - you'll come to this image - click where the image says CLICK HERE - do that

Clicking that link brings up this:
- make sure your home state is selected
(as you may have some stuff listed - click clear ALL values to start fresh)
Click ADD Default USPS Values - this is USPS 1st class ONLY for now

Approve this pop-up when it appears:

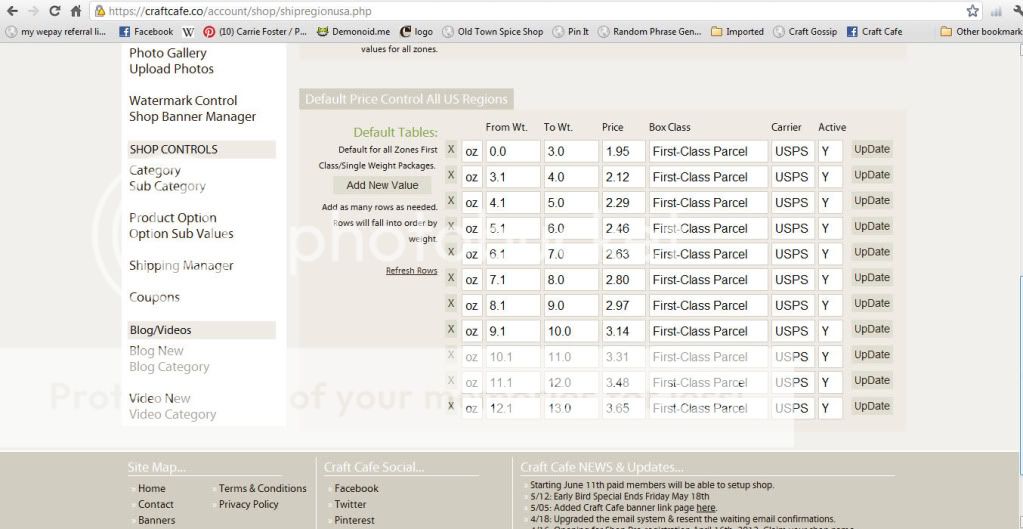
And you get this list of default USPS 1st class rates.
THIS tutorial is for shipping FLAT RATE ONLY - so the next steps from here will teach you just that!!

Note the add extra rows feature. - note the x's next to the rows - you can delete any rows you do not want or need. If you're doing flat rate ONLY - continue to the next step.

Just what the picture says - the amounts/weights are purely hypothetical for this tutorial - notice i've pared it down to 4 rates. One flat fee for up to 13oz, 1 fee for up to 16 oz, and so on.

YOU CHOOSE the weight limits based on how much you know you can get in the particular sized flat rate boxes. 
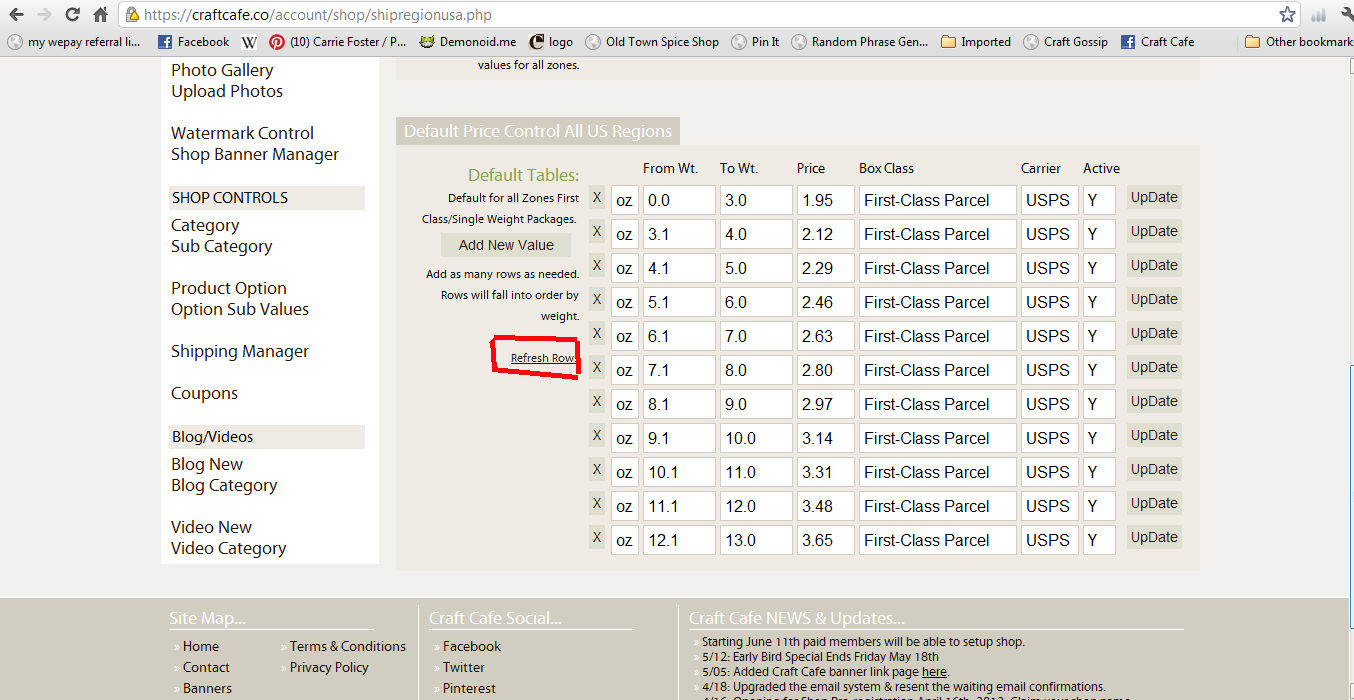
-when you add a new row - you set the max weight for that price, the price, and the type of box/pkging, carrier and MAKE SURE TO CLICK UPDATE to save your work.
- to verify its done right click refresh rows on the left side of the table. 

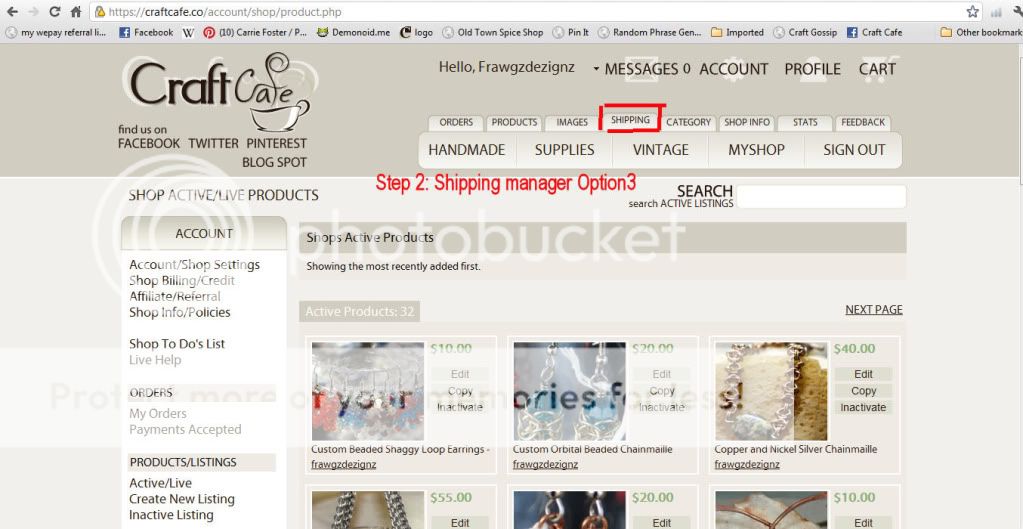
Go back to the shipping tab at the top of the page - look for this:

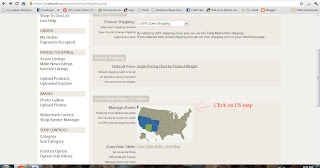
Click the US MAP  you should get a blank like this:
- make sure your home state is selected in the drop down menu at the top of the section
- make sure that you're in zone 1 at the bottom and then click every state to add it to zone 1
click update map - and yours should look like this (Only your home state will be black  instead of mine)

Go back to the shipping tab at the top (you'll get tired of me saying that by the time this is over)
Scroll down til you see this: (Click where it says CLICK HERE)

This is the window that comes up - make sure if you've been here before to start fresh and clear all values
If you've done your map right all 50 states will appear in the list like mine does here.
Click ADD Priority USPS default values - approve the pop up like you did for 1st class a few steps ago

this will populate a longer list: *NOTE the scroll bar on the right - the list goes to 70lb in increments
X out the ones you don't need. (you can just x out all of them and add new rows you need)
Here its not a weight range its UP TO a max weight. you choose max weight, price, you can edit all the fields here. CLICK UPDATE TO SAVE your edits.


It should look like this:
(again #s are hypothetical for tutorial only) - the priority mail prices in this table should match those in the other table you made earlier...but you can have more lines in the other table (1st class is in the other table)
If you don't ship internationally - you can stop here. Just make sure you have a weight entered for every item in your shop - checkout will add up the weights of the items and assign the shipping according to TOTAL weight.

----------------------------------------------------------------------------------------
International & flat rate shipping
Go back to the shipping tab at the top of the page:
Click on the international map
It will bring up something like this - except your's won't be filled in like mine -we'll get there.

Make sure you're in zone 1 - Click Canada & Mexico -
Move to zone 2 (tabs at bottom under map) - click through all the other countries you ship to (if its all of them your map will look similar to mine) I DO NOT SHIP to: Egypt, Libya, Italy or North Korea - due to import restrictions applied by those countries. - if you choose to not ship to a country don't click on it. If you click on it by accident you can undo it when you refresh the map by clicking the x next to the name of the country in the list under zone 2.

When you get to where you want it - (or where you think you want it)  click update map. Any country you didn't click last time will be in gray. You can come back here during the next step to edit/add any countries you missed.

Now go back to the shipping tab at the top of the page
Scroll down to the bottom of the page and click where it says in this image:

That will bring up this: (Clear any values you may have entered already)
Then click where it says in this image:

Here's the full populated rate table for international - if you want to ship first class - international and have it stay correct leave the rates alone up to about 44oz - that's how much weight you can put in a USPS international 1st class parcel (package). After that it has to go USPS Priority Mail - though flat rate is more economical in most cases
See this image:

If you want and know your weight limits for packages (you should from the US part of the tutorial) you can edit the tables down to like I have done here: (Again this is purely hypothetical):

**NOTE** the two zones - and the countries listed under each (For FLAT RATE - if you have countries in zone 3 - note what they are, go back to the international map - and add those remaining countries to zone 2 - so you don't end up with randomly selected countries paying a higher rate.**


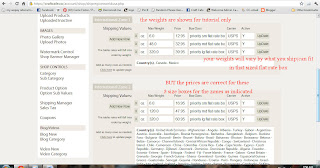
Like the image above this text says - the weights are for tutorial purposes ONLY and will probably not reflect your actual weight limits - BUT the prices ARE accurate for the type of boxes shown.


Click refresh rows - to verify your changes have been made.
If you're not sure if its right ask someone in another country to verify they see shipping in your listings - again you do need to enter a weight for each item. the cart will add up the weights of all items purchased from you and spit out a grand total weight and apply the appropriate shipping costs.
Complete the steps and you should be all set!

---Carrie - who is sorry this wasn't done sooner---

6.14.2012

Tutorial: Shipping Item Priced Shipping (and free shipping)


This tutorial will cover some of the basics of getting into your shipping management area:

Shipping can be a pain in the butt for any business. Hopefully this tutorial will help you figure out what shipping option is best for your business.
This tutorial will cover Shipping using Item priced shipping option.
Log in, then click on the SHIPPING tab at the top of the page:

The next screen you get looks like this one, 
In the shipping method drop down choose ITEM PRICED SHIPPING!


To make sure your shipping shows up correctly for your buyer(s) click on the map of the USA in the above image and make sure it knows what state you're shipping items from.  (Make sure your home state is selected in the top of the screen you get after clicking on the US map)

Now to edit your listings:
You'll need to do this same thing with each listing you have up, and for every new listing you create hereafter (Until a batch process for this is finalized)
Go to PRODUCTS tab at the top of the page, that puts you in your shop admin area.

From there click on any item in your shop and choose EDIT - this brings up the edit item window.
LIKE SO:


Scroll down to the shipping area of the item, and for USA - type in the amount shipping costs for the 1st item in the 1st box, and the amount for a 2nd item would cost to ship in the 2nd box and click CLICK TO APPLY (Formerly ADD+ ) - if you don't click the CLICK TO APPLY (formerly ADD +) after each location you ship to - your shipping will not show up properly.
You'll get a listing like this - (yours will vary depending on where you ship to).


Then just finish out your listing hit update& publish and you're done.

If you wish to do item priced shipping you can do so using this method just enter 0.00 and 0.00 for each location you ship to including the CLICK TO APPLY.

Oh yeah if you choose to do shipping by item price you have to do every single listing manually. At this time there is no global shipping change option for single item priced shipping.
Sorry.

When you're done and want to check your items - you can have a friend who has an account log in and look at your items or you can email info@craftcafe.co and ask one of our admins to help verify your shipping is set up properly.

That's it you're done.


Tutorial: Shipping on Craft Cafe - Zone + weight US ONLY

Shipping can be a pain in the butt for any business. Hopefully this tutorial will help you figure out what shipping option is best for your business.

This tutorial will cover Shipping using the zone + weight calculation.

This assumes that you're just getting to the site and have no clue about shipping or where to find it. If you know how to find shipping skip to step 5.

To begin:  this is what you see when you are logged in and you go to the Craft Cafe Home page:

Step 1 - Access your shop admin area:


Step 2: There are 3 ways to go about changing or setting your shipping type (see 3 photos for directions)
Option1: Go to your shop admin area by clicking the PRODUCTS Tab at the top of the page as shown in this photo: 


Option 2: When in your shop admin area you can click on Shipping manager about 2/3 of the way down on the left hand side (you will have to scroll a bit to get to it) as shown in this photo:

Or Option 3: When in shop admin click on the Shipping tab at the top of the page:

Option 1 leads you to a page that looks like this:

Options 2 & 3 both take you here:

We'll be progressing through this tutorial using the screen from options 2 & 3 (the previous photo).

You can see from my page I have zone shipping selected...for this tutorial if you want to select zone shipping click so it has USPS Zone Shipping selected. [you'll get a tiny little blurb to the right that flickers to say UPDATED]

 Step 3: Choosing Zone Shipping will bring up this:
I live in Indiana - so that's what I choose for home state (you pick your home state, where you ship from).

(Ignore the fact I have default values showing in this screen cap please).

Step 4: Scroll down and you'll see a large blank area (- this assumes you have not set up this type of shipping before) as shown here: 

Step 5: About half way between the views in step 3 & step 4 you'll see this:
Click where the photo tells you to and it will populate a default USPS First class weight/price table.

Step 6: this is the result of you clicking the ADD default values from the last step:
Its a confirmation basically - - click the only option available at this point.

Step 7:  This populates the table with USPS default weights & prices. 
As shown this list only goes to 13oz  (USPS first class) but we can edit it as I'll show you in the next couple of steps.

Step 7B - adding rows to your default shipping values panel.
Say you have items that can really add up fast in weight. You don't want to undercharge your customer but you don't want to overcharge them either.

If you know you can ship say 3 bars of soap weighing over 13 oz but under 18oz and you want to use a small flat rate box you can add a line to represent from 13.1oz - 18oz
Click the Add new value (shown by red box)

This brings up this:

This step is purely hypothetical for my items but I'm doing it to show you how to do this:
it only gives you the higher end range of weights.
So for the purposes of this tutorial I'm going to say my upper limit for this next shipping weight range is 22oz the price is that of a USPS Small flat rate box with delivery confirmation $6.10 (See below for how I filled out the row. Make sure you click SAVE to save it.

Now click refresh rows:


And you get:


If you want to add more values you just repeat the last 3 frames:
To save time and bandwidth I'm just showing how I added 3 types of flat rate boxes to the zone default shipping cost list. 


Notice there's only 3 values added to the list 3 types of flat rate boxes (these # are based on me helping someone earlier, yours will vary with how much you know you can fit in which box)

*Explanation Time* - Within the US if you're shipping 1st class up to 13 oz and flat rate priority ONLY - you don't really have to worry about setting up a lot of zones in the next steps. For you everything will be zone 1. It costs EVERYONE in the US the same flat fee to ship any package 1-13oz anywhere else in the US. And flat rate priority is just that - Flat rate for everyone.

If you're needing to do more intricate Non-flat rate shipping, your tutorial from here-on-out will be a lot more complicated & different. 

ONLY YOU know what your products weigh I can help where I can if you have the information to help me help you.


Now to set up your zones - everyone doing zone shipping will have to do this - but how detailed you get depends on whether you're doing flat rate like above or not.

Click shipping manager to the left:


This is your zone map without any states filled in:


If you're doing what I explained earlier about EVERYWHERE in the US has the same shipping fees - just go through and click all the states as zone 1. 


It should look like so:


All US states are blue - (except your home state) - this means everything ships for the same price everywhere but that the cost depends on the total weight of the package.


For International Shipping I will skip adding the map and things because that is a bit more complicated than I want to get into for this basic zone shipping tutorial. I will work out a more detailed international shipping for US to int locations tutorial later...

But that concludes US shipping by zones (the easy way).


All rights reserved by CraftCafe LLC. Watermark theme. Powered by Blogger.