


Shipping can be a pain in the butt for any business. Hopefully this tutorial will help you figure out what shipping option is best for your business.
This tutorial will cover Shipping using the zone + weight calculation.
This assumes that you're just getting to the site and have no clue about shipping or where to find it. If you know how to find shipping skip to step 5.
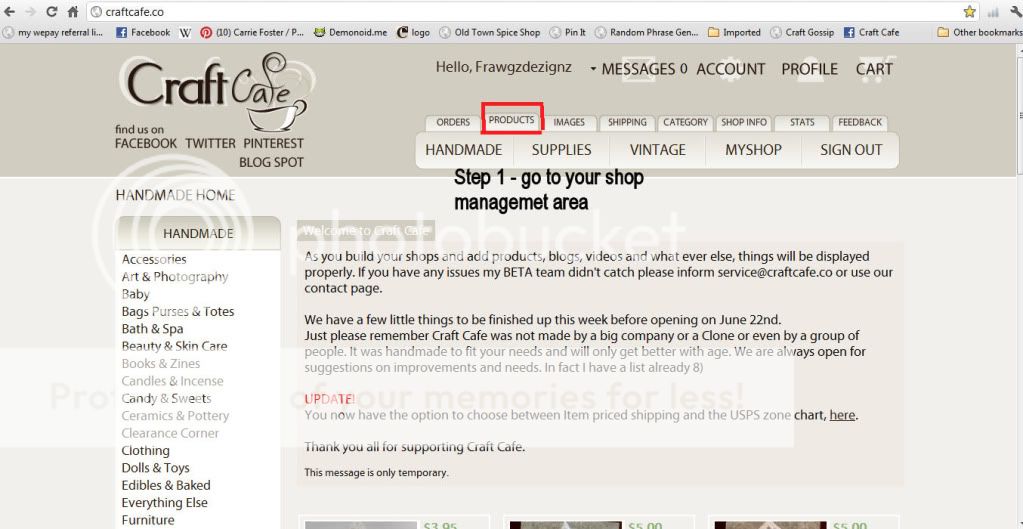
To begin: this is what you see when you are logged in and you go to the Craft Cafe Home page:

Step 1 - Access your shop admin area:
Step 2: There are 3 ways to go about changing or setting your shipping type (see 3 photos for directions)
Option1: Go to your shop admin area by clicking the PRODUCTS Tab at the top of the page as shown in this photo:
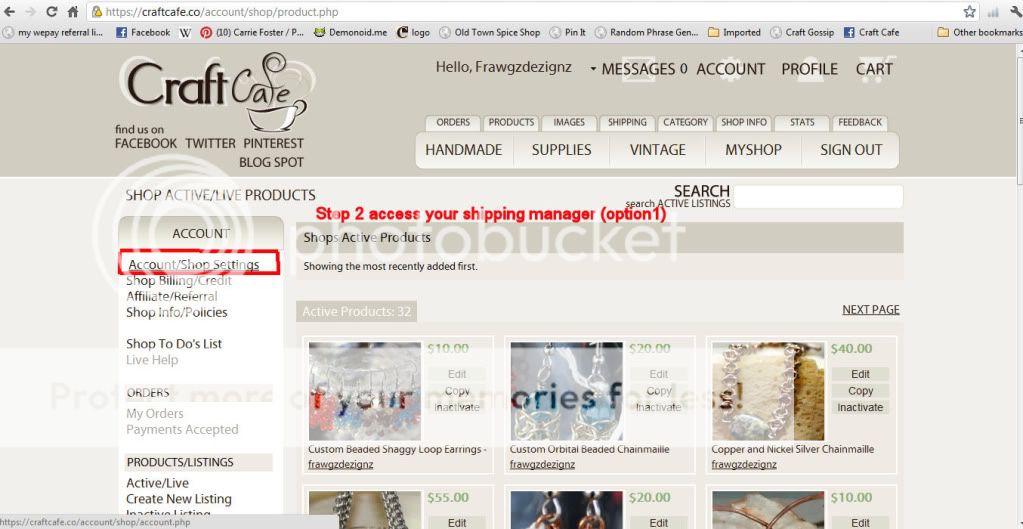
Option 2: When in your shop admin area you can click on Shipping manager about 2/3 of the way down on the left hand side (you will have to scroll a bit to get to it) as shown in this photo:

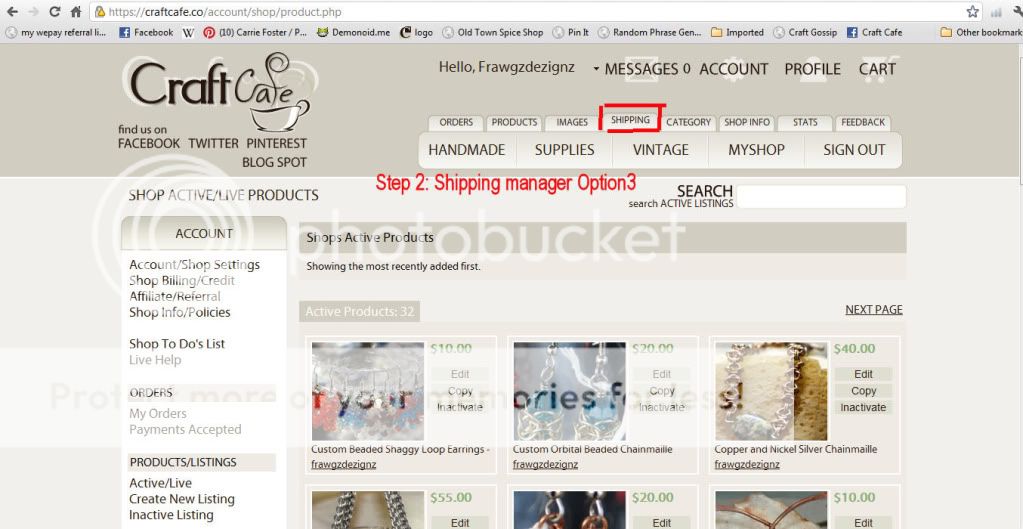
Or Option 3: When in shop admin click on the Shipping tab at the top of the page:
Option 1 leads you to a page that looks like this:

Options 2 & 3 both take you here:

We'll be progressing through this tutorial using the screen from options 2 & 3 (the previous photo).
You can see from my page I have zone shipping selected...for this tutorial if you want to select zone shipping click so it has USPS Zone Shipping selected. [you'll get a tiny little blurb to the right that flickers to say UPDATED]
Step 3: Choosing Zone Shipping will bring up this:
I live in Indiana - so that's what I choose for home state (you pick your home state, where you ship from).

(Ignore the fact I have default values showing in this screen cap please).
Step 4: Scroll down and you'll see a large blank area (- this assumes you have not set up this type of shipping before) as shown here:
Step 5: About half way between the views in step 3 & step 4 you'll see this:
Click where the photo tells you to and it will populate a default USPS First class weight/price table.
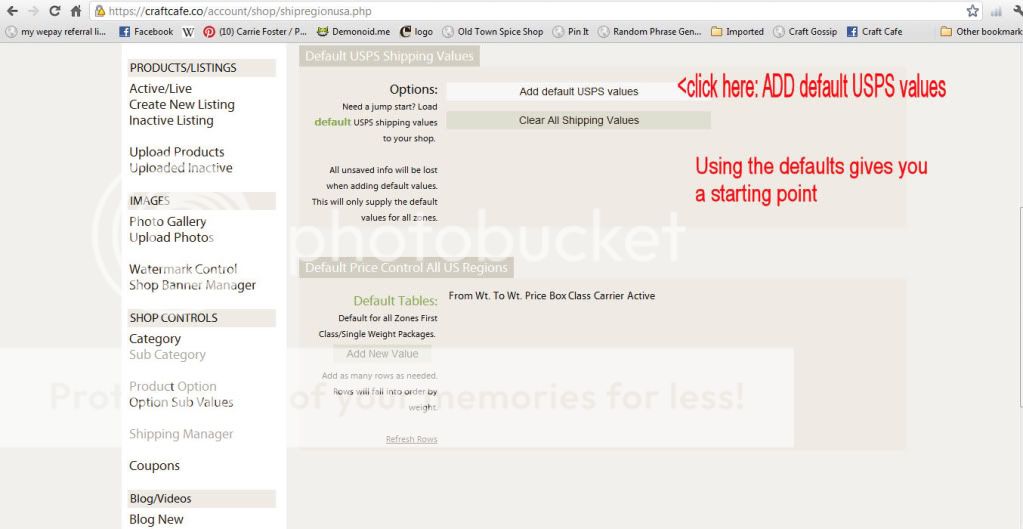
Step 6: this is the result of you clicking the ADD default values from the last step:
Its a confirmation basically - - click the only option available at this point.

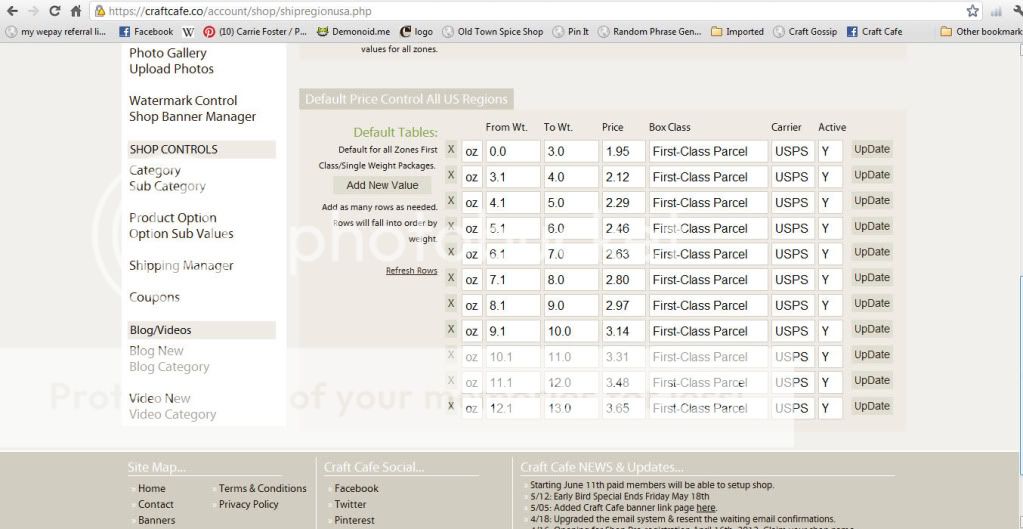
Step 7: This populates the table with USPS default weights & prices.
As shown this list only goes to 13oz (USPS first class) but we can edit it as I'll show you in the next couple of steps.
Step 7B - adding rows to your default shipping values panel.
Say you have items that can really add up fast in weight. You don't want to undercharge your customer but you don't want to overcharge them either.
If you know you can ship say 3 bars of soap weighing over 13 oz but under 18oz and you want to use a small flat rate box you can add a line to represent from 13.1oz - 18oz
Click the Add new value (shown by red box)

This brings up this:

This step is purely hypothetical for my items but I'm doing it to show you how to do this:
it only gives you the higher end range of weights.
So for the purposes of this tutorial I'm going to say my upper limit for this next shipping weight range is 22oz the price is that of a USPS Small flat rate box with delivery confirmation $6.10 (See below for how I filled out the row. Make sure you click SAVE to save it.

Now click refresh rows:
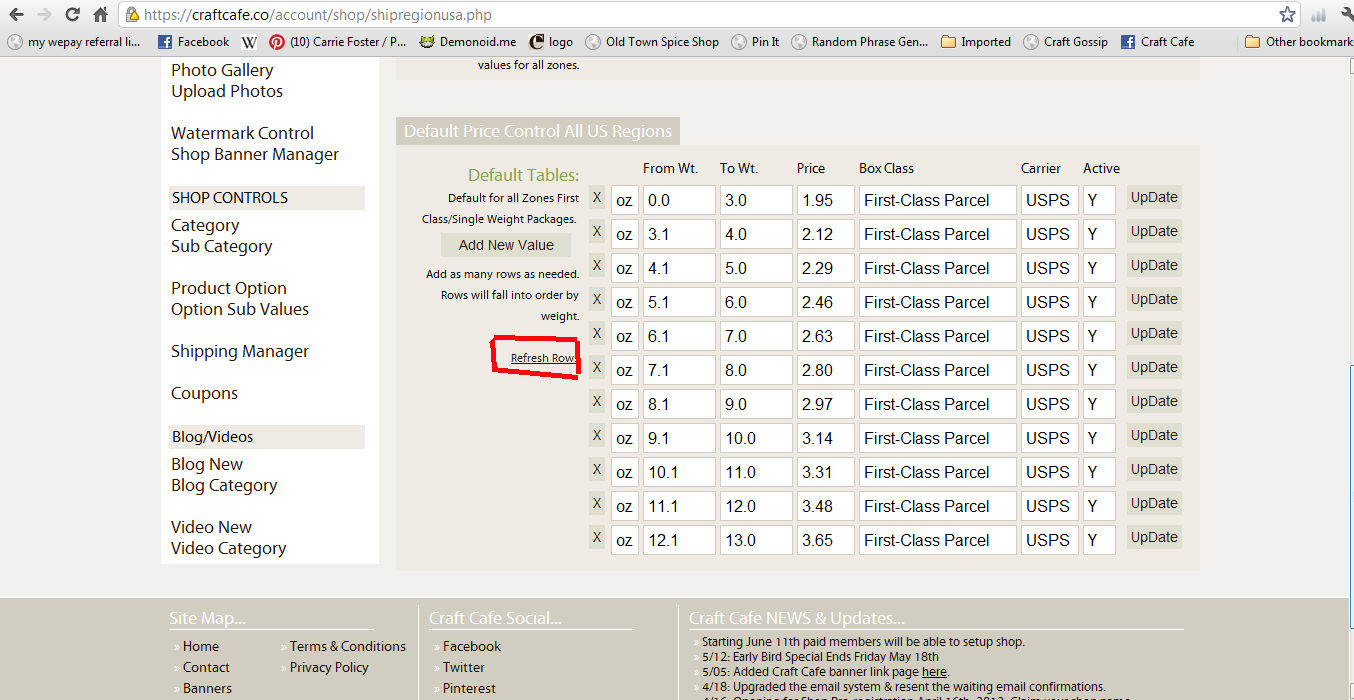
And you get:

If you want to add more values you just repeat the last 3 frames:
To save time and bandwidth I'm just showing how I added 3 types of flat rate boxes to the zone default shipping cost list.

Notice there's only 3 values added to the list 3 types of flat rate boxes (these # are based on me helping someone earlier, yours will vary with how much you know you can fit in which box)
*Explanation Time* - Within the US if you're shipping 1st class up to 13 oz and flat rate priority ONLY - you don't really have to worry about setting up a lot of zones in the next steps. For you everything will be zone 1. It costs EVERYONE in the US the same flat fee to ship any package 1-13oz anywhere else in the US. And flat rate priority is just that - Flat rate for everyone.
If you're needing to do more intricate Non-flat rate shipping, your tutorial from here-on-out will be a lot more complicated & different.
ONLY YOU know what your products weigh I can help where I can if you have the information to help me help you.
Now to set up your zones - everyone doing zone shipping will have to do this - but how detailed you get depends on whether you're doing flat rate like above or not.
Click shipping manager to the left:

This is your zone map without any states filled in:

If you're doing what I explained earlier about EVERYWHERE in the US has the same shipping fees - just go through and click all the states as zone 1.
It should look like so:

All US states are blue - (except your home state) - this means everything ships for the same price everywhere but that the cost depends on the total weight of the package.
For International Shipping I will skip adding the map and things because that is a bit more complicated than I want to get into for this basic zone shipping tutorial. I will work out a more detailed international shipping for US to int locations tutorial later...
But that concludes US shipping by zones (the easy way).
Can you tell me how I know what zone each stat is? i do not understand how to mark them.
ReplyDeletethank you for all your help
Why does my shipping show a price change back down, i.e., from 12.1 - 13 is $3.65 and then 13.1 - 3.0 is $1.95 and 3.1 - 4.0 is $2.12 and 4.1 - 5.0 $2.91 etc.?
ReplyDeleteNever min I fixed.
ReplyDeleteThe zones are based off where you live, so they are different based on where you are. You can check your postal zone charts out here: http://postcalc.usps.gov/Zonecharts/
ReplyDelete